



Opening a new store is a big moment. The shopfit looks sharp, the stock is on the shelves, and then the card terminal refuses to connect ten minutes before the doors open. Sound familiar? You’re not alone, and it’s completely avoidable.
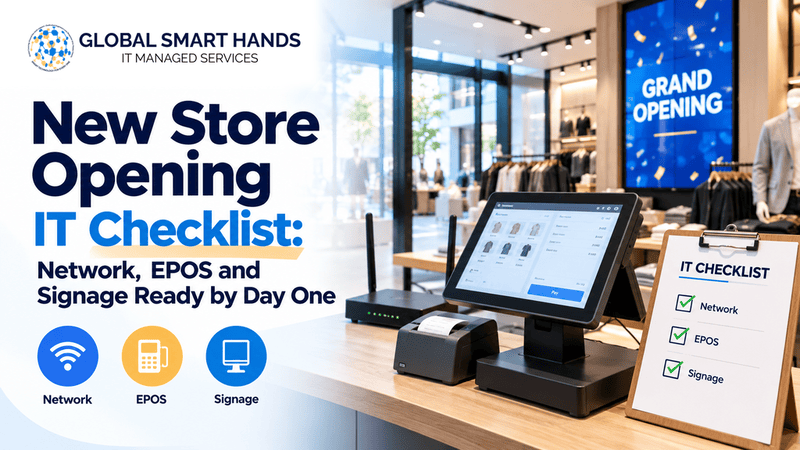
A new store opening IT checklist should lock in connectivity 60 to 90 days out, install structured cabling and a segmented network next, then set up and test EPOS tills, payment terminals and digital signage at least a week before launch.
Finish with a full-load rehearsal, staff training and on-site engineer cover booked for opening day, so small faults never stop you trading. In this blog, we are going to state a clear timeline, the tasks in each phase, and the small details that catch out even experienced retail teams.
Why Day-One IT Readiness Matters More Than Ever
Shoppers rarely reach for cash anymore. Cards made up 48% of in-store spending worldwide in 2025, with digital wallets adding another 33%, according to Worldpay’s Global Payments Report 2026. If your tills or card terminals stall, you can’t take most of the money walking through your door.
Downtime hurts at every scale. Research by Splunk and Oxford Economics puts the cost of unplanned downtime for the world’s 2,000 largest companies at $400 billion a year, roughly 9% of their profits.
Retail has felt this sharply. Marks & Spencer warned of a potential £300 million hit to operating profit after a 2025 cyber attack halted online orders and disrupted stock. A new store gives you a clean slate, so build it right from day one rather than patching gaps later. Our guide to minimising downtime across retail locations shares more ideas.
Your Store Opening IT Timeline at a Glance
Good retail store IT setup runs on a countdown, not a scramble. Work backwards from opening day and give the slowest jobs the longest runway.
Shopify, for example, recommends setting up POS devices at least one week before launch to leave time for troubleshooting. Treat that as the bare minimum, not the target.
Phase 1: Retail Network Setup and Connectivity
Tills, card readers, scanners, CCTV and screens all ride on the network, so your retail network setup starts first and deserves the most attention.
Order Your Internet Circuits First
Connectivity is the task most likely to push back your opening. Business fibre providers commonly quote 60 to 90 days for a leased line, and wayleaves, blocked ducts or roadworks can stretch that further.
Here’s a detail many guides skip. In shopping centres and retail parks, the landlord usually controls the risers, comms rooms and cable entry points. Ask for the landlord’s technical contact the day you sign the lease, not the week you collect the keys.
Survey the Site Before Any Cable Goes In
A proper survey before installation saves costly rework. It checks:
- Comms cabinet location, ventilation and a dedicated power circuit
- Data point positions for every till, printer, screen and access point
- Mobile signal strength for your backup router (basement units often have very little)
- Ceiling voids, existing ducting and fire-stopping rules
Our article on why pre-deployment site surveys matter explains what a thorough survey should cover.
Segment the Network to Protect Card Data
Split your network into separate lanes, called VLANs, so a problem in one area can’t spill into another. Most stores use five: EPOS, payments, digital signage, staff devices and guest Wi-Fi.
Strictly speaking, PCI DSS doesn’t force you to segment. Without it, though, your whole store network falls into compliance scope. The PCI DSS v4.0 future-dated requirements became mandatory on 31 March 2025, including multi-factor authentication for every route into the cardholder data environment.
Watch your suppliers too. The 2026 Verizon Data Breach Investigations Report found a third party involved in 48% of breaches. Lock down every vendor’s remote access before you open.
Add Failover and Plan Wi-Fi for a Busy Store
One internet line means one point of failure. Add a 4G or 5G backup router that switches over automatically, then test it properly by unplugging the main line during a test sale.
Plan Wi-Fi for a packed shop, not an empty one. Human bodies absorb Wi-Fi signals, so coverage that looks perfect during a quiet survey can drop once the aisles fill up. Add access points in busy zones and wherever staff use handheld devices.
Running several sites? Our guide to network maintenance for multi-location enterprises covers keeping every branch consistent.
Phase 2: EPOS Installation and Payments
Your EPOS installation is where the money happens, so give it plenty of testing time. A smooth POS system setup comes down to staging, paperwork and repeated testing.
Stage and Configure Tills Before They Ship
Build and configure tills, printers and scanners at a central location, then ship them ready to plug in. It cuts on-site time and keeps every store on the same build.
Planning a multi-country launch? See how smart hands engineers speed up EPOS rollouts across regions.
Get Payment Terminals Provisioned Early
This step slips more often than any other. Your merchant ID and terminal IDs come from your payment acquirer, not your IT team, and they rarely arrive overnight.
Request them as soon as you confirm the store’s trading details, then test each terminal on the live store network rather than a borrowed hotspot.
Test Every Transaction Type on Every Till
Run real test transactions on every till, not just the first one. Check:
- Chip and PIN, contactless and mobile wallet payments
- Refunds, voids and exchanges
- Discounts, promotions and gift cards
- Receipt printing and cash drawer opening
- End-of-day reports and reconciliation
Give receipt and kitchen printers fixed IP addresses through DHCP reservations. Otherwise, a printer can pick up a new address after a lease renewal, and your tills suddenly can’t find it mid-shift.
Rehearse Offline Mode
Ask your EPOS provider exactly what works offline, then try it. Pull the network cable, take a sale, reconnect and confirm the transaction syncs. Staff should see offline mode in training, not for the first time with a queue at the till.
For longer-term reliability, see our tips on preventing EPOS failures with proactive on-site support.
Phase 3: Digital Signage Installation
Screens shape a shopper’s first impression, and retailers keep investing in them. Mordor Intelligence values the retail digital signage market at $6.24 billion in 2026, rising to $8.29 billion by 2031. Here’s how to get your digital signage installation ready for day one.
Map Power, Data and Mounting Points
Fix the position of every screen before the walls are finished. Each one needs a power socket, a wired data point where possible and a mount rated for its size and weight. Running cables behind finished panels costs far more than planning them in.
Choose Commercial-Grade Displays
Consumer TVs look tempting on price, but many consumer warranties exclude commercial use. Commercial displays handle long operating hours, offer brighter panels for shop windows and support remote management.
Load and Schedule Content Early
Register each media player in your content management system (CMS), load playlists and set schedules a week ahead. Turn on cached playback so screens keep running if the connection drops, and set alerts for any screen that goes offline.
The 48-Hour Pre-Opening Test
Two days before opening, run a full rehearsal with everything switched on at once. A network that passes empty-store tests can still buckle under real load. Use this store opening checklist as your go/no-go list:
- Confirm the main line is live and test the 4G/5G failover
- Log in to every till with staff PINs
- Take card, contactless and wallet payments on each terminal
- Process refunds and print receipts on every till
- Confirm guest Wi-Fi can’t reach EPOS or payment devices
- Check every screen plays the right content on schedule
- Change default passwords on routers, terminals and media players
- Leave a network diagram and support contacts in the comms cabinet
- Keep spares on site: card reader, receipt printer and power supplies
- Book an engineer on site for opening morning
Tick every item, and your new store opening IT checklist becomes a launch-day safety net rather than a wish list.
Common Mistakes That Derail Opening Day
Across store launches, the same problems show up again and again:
- Leaving connectivity until fit-out: circuits take weeks, not days.
- Testing one till instead of all of them: faults hide on the unit nobody checked.
- Mixing guest Wi-Fi with EPOS traffic: it slows tills and widens your PCI scope.
- Training staff on an unfinished system: they learn workarounds instead of the real process.
- Nobody on site at opening: a ten-minute fix turns into a two-hour outage.
A quick post-project site survey after opening also catches loose ends before they become support tickets.
How Global Smart Hands Helps You Open Stores on Time
Global Smart Hands is a London-based IT managed services provider with more than 5,000 engineers across 150+ countries. That means you get the same standard of retail IT support whether your next store opens in Manchester, Dubai or Singapore.
Pre-Opening Site Surveys
Engineers visit before fit-out to check cabling routes, comms cabinet positions, power and mobile signal. Their site surveys give you a clear plan before a single cable goes in.
Network and IT Infrastructure Builds
The team installs and configures routers, firewalls, switches and Wi-Fi through its network and IT infrastructure services, leaving tidy, labelled cabinets your remote teams can manage. Their guide to rack and stack preparation shows the groundwork involved.
EPOS Installation and Retail Support
Global Smart Hands offers vendor-neutral EPOS and retail support, installing tills, receipt printers, barcode scanners and footfall counters from brands such as Toshiba, Epson and ELO. Engineers carry spare parts and fit a hot spare if a repair can’t be finished on site.
Opening-Day Cover and Flexible SLAs
Book an engineer to stand by on launch day, or arrange on-demand engineers under a tailored SLA. The team offers engineer call-out within four hours in major cities, backed by 24/7 international IT support once you’re trading.
Ongoing Changes After Launch
When you add tills, move screens or refit a department, the IMAC service handles installs, moves, adds and changes without disrupting trading. Check the global coverage page to see where engineers operate.
Open Your Next Store With Confidence
A smooth opening day doesn’t happen by luck. It comes from a new store opening IT checklist that starts early and ends with proper testing.
Order your circuits 60 to 90 days out, survey the site and build a segmented network with automatic failover. Stage and test every EPOS till and payment terminal, then install commercial-grade screens with content scheduled in advance. Finally, run a full-load rehearsal 48 hours before launch and keep an engineer on site when the doors open.
Want a partner who handles the hands-on work in more than 150 countries? Contact Global Smart Hands today to plan your next store launch and open on time, with every system ready from the first sale.
FAQs About Setting Up IT for a New Store
What IT equipment do you need to open a retail store?
Most stores need a router or firewall, network switch, Wi-Fi access points, EPOS terminals, card readers, receipt printers, barcode scanners, a UPS and CCTV. Many also add digital signage screens and media players.
How much internet speed does a retail store need?
Shopify recommends at least 10 Mbps for its POS, but treat that as a floor. Guest Wi-Fi, cloud CCTV and video signage all add load, so choose business fibre with plenty of headroom.
Do small retailers need to be PCI compliant?
Yes. Every business that accepts card payments must comply with PCI DSS, whatever its size. Smaller merchants usually confirm compliance through a Self-Assessment Questionnaire (SAQ) rather than a full on-site audit.
Do I need a UPS for my EPOS system?
Yes, at least for your comms cabinet. A UPS keeps the router, firewall and switches running through brief power cuts, protects against data corruption and gives tills time to shut down safely.
Should I lease or buy EPOS hardware?
Buying costs more upfront but often works out cheaper over the hardware’s lifespan. Leasing spreads the cost, usually bundles support and makes upgrades easier, which suits fast-growing retail chains.